How to Make a DIY Flower Crown
Flower crowns have a beautiful aesthetic, and they provide the perfect touch for a wedding. Of course, other occasions can call for them too, but weddings are where they are seen the most.
You can buy these at many locations and wear them whenever you’re ready. Alternatively, you can save yourself some cash and have some fun making your own.
The most important thing is that the crown that you make must reflect the season’s beauty. You can’t do that if the flowers you use appear to be on life support. This is the reason that you must always ensure that the flowers you use are fresh.
You can expect to learn the following:
- Materials required for the crown
- Flower ideas
- The four-step process to making your crown
Once you’re finished going through all this, you should be able to create a flower crown masterpiece.
Materials Required for the Crown
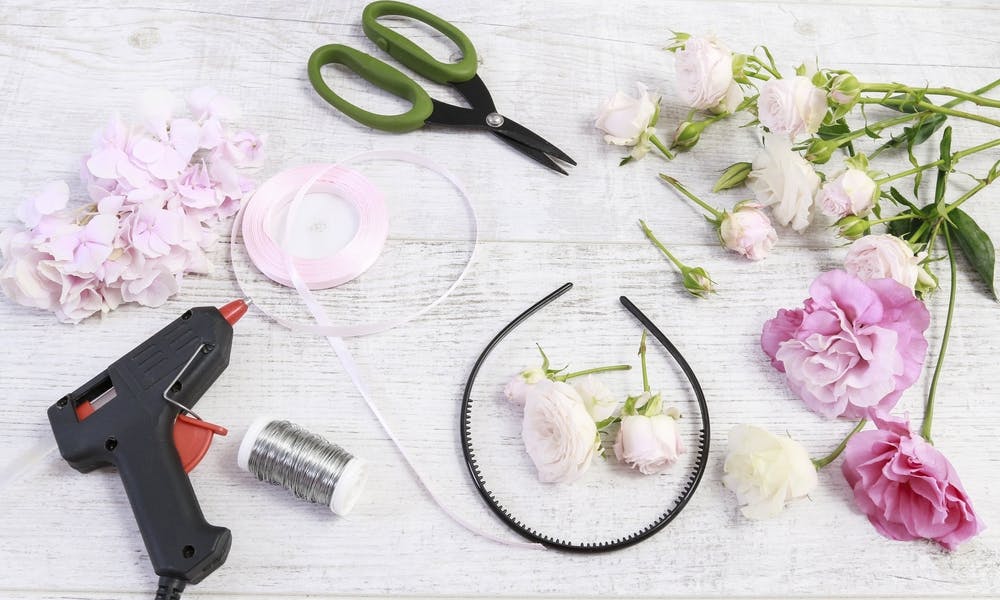
Before you think of assembling anything, there are five basic ingredients that you must have on hand if you want to go through with this. These are as follows:
- Flowers and greenery – Try to spice up your assortment with various designs and textures. Stems should be cut at two to three inches
- Craft wire – This is easier to use than pre-cut wires. This is for affixing the flowers to the crown
- Wire – This vine wire is used for the base of the crown
- Scissors – This is just for you to cut things when needed
- Floral tape – This is what is used to wrap flowers together. The colors also blend well with blooms
Flower Ideas
Here is a list of statement flowers that you can consider as you build your crown:
- Feverfew
- Snapdragon
- Astilbe
- Poms
- Baby’s Breath
- Statics
Filler flowers are also required to complete your crown. Here is a list of filler flowers that should work great to complement the statement flowers:
- Lemon Leaf
- Dusty Miller Ivy
- Eucalyptus
- Myrtle
- Ivy
- Leather Fern
Remember that this is for your purpose and your event, so it must be customized to fit you. While getting inspiration is a great idea, go for something that is centered around you. Pick out your flowers and get ready to dive in!
Step One – Wire Shaping
This is where you prepare the wire by shaping it in the size that is needed for the crown. Remember, this is meant to be worn, and it needs to be comfortable. Therefore, feel free to tweak it as much as is necessary to find a comfortable fit for your head.
If it’s squeezing you the whole time, you may end up wanting to throw it as far away as possible. As a rule of thumb, leaving a half-inch of extra space is recommended.
Once you figure out the size, cut away the excess wire, and use floral tape to secure the ends. Remember to consider the hairstyle for the event in all of this. After all, some styles require more space than others.
Step Two – Greenery Wrapping
This step is all about getting your filler flowers set up and ready to go. The floral tape should be used to bind the greenery to the wire. Of course, the binding should be done by the stems. If not, then you could end up with a very odd final product.
Note that not every filler plant can achieve the same look, so choose wisely. For example, if delicate is what you’re trying to achieve, maybe ivy is best. If you want a fuller crown though, maybe a fuller green like the dusty miller is best.
Note that you can highlight your focus flowers even more by adjusting the proportions. Feel free to add fewer filler flowers or none, if you want to tip the scales.
Step Three – Flower Arrangements
Your statement flowers are not to be affixed to the crown as individuals. Instead, they are to be affixed to each other in small bundles first prior to being placed on the wire. Doing these three at a time is a great way to proceed.
Use floral tape to bind the stems together to create your flower bunches. Wrapping from the bloom’s base to the bottom of the stem is a great idea. This allows you to ensure that everything stays together in a secure manner.
If you want to achieve a balance, feel free to throw in some filler flowers as well. On average, eight flower bunches are all it takes to get the crown going. Note that this can be subjective, though. So, if your crown needs more to make you happy, then make more.
Step Four – Bring It Together
This is the step where you start affixing your flower bunches to the crown. Just like before, the stems must be used to attach the flowers to the crown. Doing so makes it sturdier.
You can affix your bunches with either your floral tape or your craft wire. A seamless look is created by layering blooms over the stems of flower bunches that were already placed. If you want your blooms to stand out, ensure that all the flowers are attached in one direction. You can stop whenever the look of your crown pleases you.
Remember that you can go wild with this to create an aesthetic that suits you. Therefore, if you want to create a traditional crown look, you can. To do this, simply affix a few bunches to the front, and populate the rest with filler flowers.
Summary
Flower crowns can be used for a variety of special events such as weddings. You can make your own if you want to have some fun and save some cash.
Before you begin, ensure you have flowers and greenery, a pair of scissors, craft wire, wire, and floral tape.
Begin by shaping the wire in a way that leaves a half-inch of space when placed on the head. From there, affix filler flowers to the crown by their stems. Next, make flower bunches by grouping statement flowers in threes. Finally, affix the flowers to the crown.

