Floral crowns are a festive and beautiful touch for weddings, birthday celebrations, and festivals. Floral crowns change any little girl into a princess. With just a few simple steps, you can create a flower crown to top any occasion. They are as easy to make as they are to wear.
As you read this article, you can learn the flowing:
- Supplies Needed to Make a Crown
- Tools Used
- The Steps to Make a Beautiful Crown
- How to Add Even More Flowers
- Prolonging the Life of Your Crown
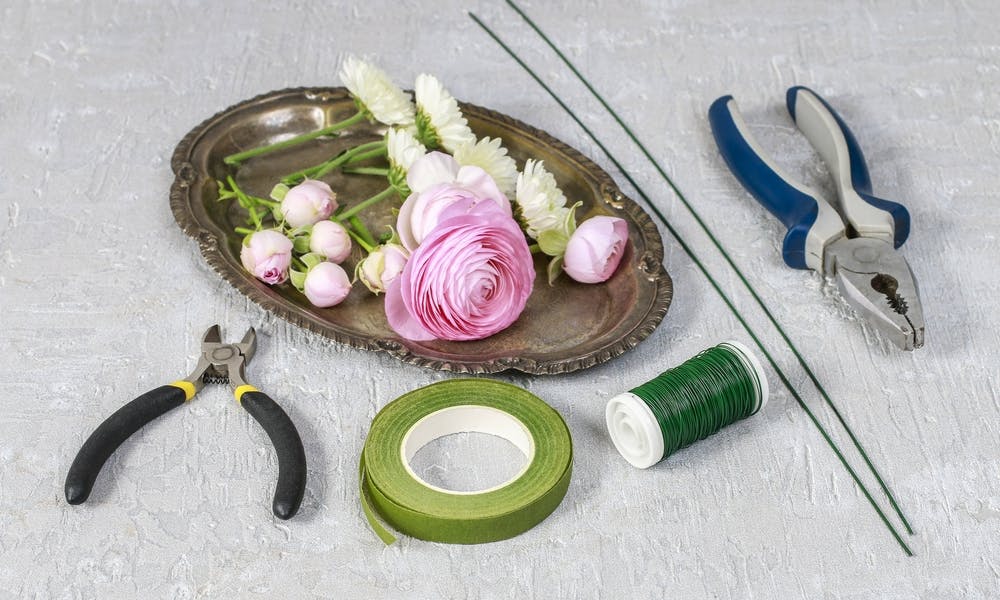
Supplies Needed to Make a Crown
Almost any flower is a good choice for your crown. Your decision should be based on the predominant color you want for the occasion. Combining different shapes and sizes add texture and interest to the crown.
The smaller flowers that work well include wax flowers, ranunculus, spray roses, yarrow, and baby’s breath. Larger flowers that add a stunning touch to the crown are peonies, orchards, and anemones.
Weave greenery into a crown to add depth and contrast to the wreath. Use greenery that is pliable and easy to work such as olive branches, Italian Ruscus, and eucalyptus branches. You can also add ivy, lemon leaf, and leather fern.
Tools Used
The tools that you use are found in any toolbox or garden workbench.
- Wire cutters
- Floral wire (26-gauge, paper-covered)
- Floral tape
- Paper wrapped floral wire
- Hot glue
The Steps to Make a Beautiful Crown
- Precut the floral tape into 2-inch long pieces to have ready for wrapping flower stems. The floral stem tape does not feel sticky when being handled and may take some practice to get used to. The tape is self-sealing so not only can it stick to the flower but to itself as well.
- Prepare your flowers for use by cutting all the flower stems to 1.5 inches in length. Strip any remaining leaves from the end of the stem.
- Prepare each flower with the tape by holding the top of the tape with your thumb against the top of the stem. Twist the flower with your other hand while moving the tape down the stem as you twist and wrap. Floral tape is not sticky until you pull it taut. Be sure to wrap the stem as tightly as possible. At the end of the stem, pinch or tear off any remaining tape. You can also tape two or three flowers together in a bunch by using a statement flower and two or three smaller flowers. Once the flowers have been taped, you are ready to create the crown.
- Measure the head of the person who will be wearing the crown. Add 6 inches to the measurement and cut the paper wrapped wire to that length. A wire of 20 to 22 inches creates a crown that fits most adults. The extra 6 inches allows for a final adjustment for the perfect fit. Be sure to take into account different hairstyles that the wearer may have that would affect the size of the crown.
- You are now ready for adding the flowers. Take one of the prepared flowers and place it against the wire three inches from the end. Using the stem tape, secure the flower to the wire by pulling the tape tight as you wind it around the flower and wire. Add the next flower by overlapping the new flower over the previous one. Wrap tape around this flower securing it to the wire. Continue to add single flowers or floral clusters until you have added enough flowers to reach 3 inches short of the end of the wire.
- Tie the ends of the wire to finish the crown. For a more decorative and festive touch add ribbon to each end of the wire. The ribbon gives the wearer the ability to adjust the crown to different sizes. In addition to the ribbon, you can add any decorative accessory to the crown such as clips, shells, or rhinestones.
- A larger flower such as a rose can be added to the wreath with a few extra steps. First, cut the stem of the rose to 1 to 2 inches in length. Then take a 4-inch piece of 18-22-gauge wire and pierce the wire into the base of the rose. Wind the rest of the wire around the stem holding the wire in the base secure. Now the rose can be added to the crown in the same method as the previous flowers.
How to Add Even More Flowers
You can augment the crown with additional flowers by gluing them to the completed crown. Start by trimming the stems of the accent flowers right up to the base. Apply hot glue and place the flower in the crown. Continue to apply the smaller accent flowers until you achieve the desired look.
Invariably, a few strands of cobweb-like glue strings are left on the finished crown. To remove these, just take a hairdryer set on low and blow warm air over the crown. The glue disappears.
Prolonging the Life of Your Crown
After all the effort you put into your crown, you need to take a few easy steps to preserve and prolong the life of your crown. One method is to spray a light mist of Crowning Glory over the flowers. The product is safe to use on all flower types. It dries clear and leaves no residue. Another method to preserve your flowers is to place the crown in the refrigerator until it is worn. Refrigeration slows down water loss and helps maintain a crisp look to your flowers.
Conclusion
Flowers don’t have to be limited to tabletops and bouquets during a festive occasion. Which just a few tools and supplies, get creative and have some fun making unique and fun floral crowns. They make the wearer feel special and it adds a unique touch to any occasion.

