Customer favourite since 2005
Worldwide delivery to 100+ countries

Welcome to the latest post in our DIY With Flowers Series. Today we will be learning a very interesting technique, how to press flowers. It dates back centuries with examples evident in Asian, European, and even Egyptian cultures. It is a fairly simple process that people of all ages can enjoy.
Many times we receive a beautiful bouquet as a gift, or perhaps it is part of a special event such as a wedding. And we often wish that those beautiful flowers could last forever. Well now they can, with flower pressing you are able to select your favorite flowers from any arrangement and make them last forever. The idea is simple, the flowers are pressed and dried, flattening them for easy storage or usage as well as drying them for preservation. Here we will show you one of the easiest ways to press flowers!
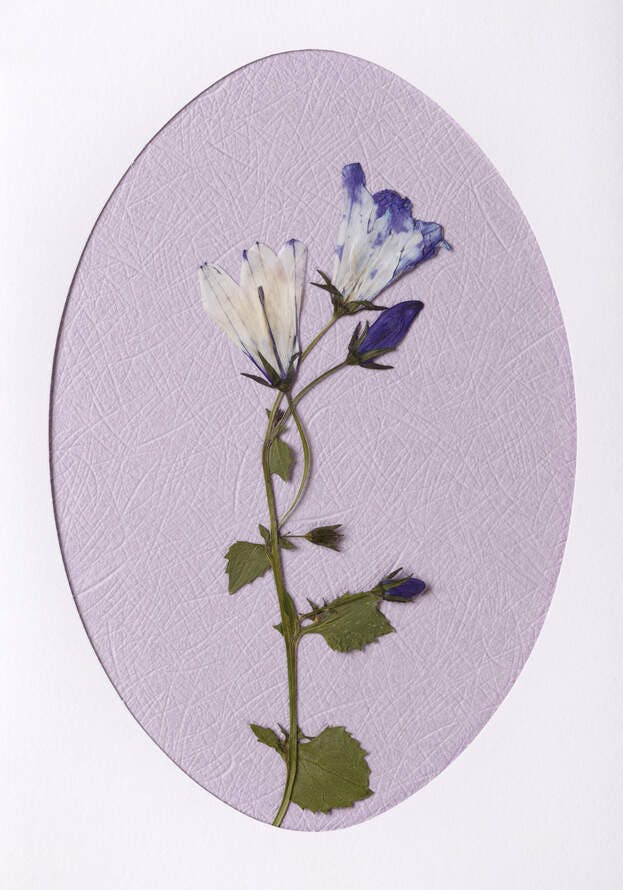
If you are using flowers from a bouquet select your favorite ones that are still fresh and undamaged. When they have just bloomed is the best time to press them as this will preserve the color. You want the flowers to be free of damage, brown spots or broken petals. Keep in mind that natural thin flowers will work best, such as daises, gerberas, or violets. It is possible to press thicker flowers such as roses or peonies but we recommend cutting them in half prior to pressing them. If picking your own flowers pick them as buds so that you are able to press them right as they open.
It is important that the flowers are ready to be pressed. Once you have selected your ideal flowers, either from a bouquet or from you garden, then you want to trim them to size. You want to make sure that they will fit into your press. You also want to trim off any excess leaves that you may not want. Once you have them to the desired size gently dry them between two pieces of paper. This is just to remove any excess water from the flowers. Once the flowers are the correct size and all excess water is removed you are ready to proceed to pressing the flowers
The easiest and most convenient way to press flowers is with a heavy book. You want to use a large heavy book such as a dictionary or phone book. Be sure that it is a book that you no longer want as it may get damaged by the moisture from the flowers. Open the book to roughly the center, lay flat on your work surface. Next lay 2 pieces of paper on one side of the open book. Arrange your flowers on top of the pieces of paper. Remember the flowers will be preserved as you position them, it is also best to not over lap the flowers too much as this will cause them to take longer to dry. Once you are happy with how the arrangement looks gently place another two sheets of paper on top of the flowers. Carefully close the book making sure to not move your arrangement. Pile more heavy books on top of the closed book for added weight and store in a dry place. Gently open the book press and change out the paper for new dry paper every few days. After a few weeks the flowers should be completely pressed and dried
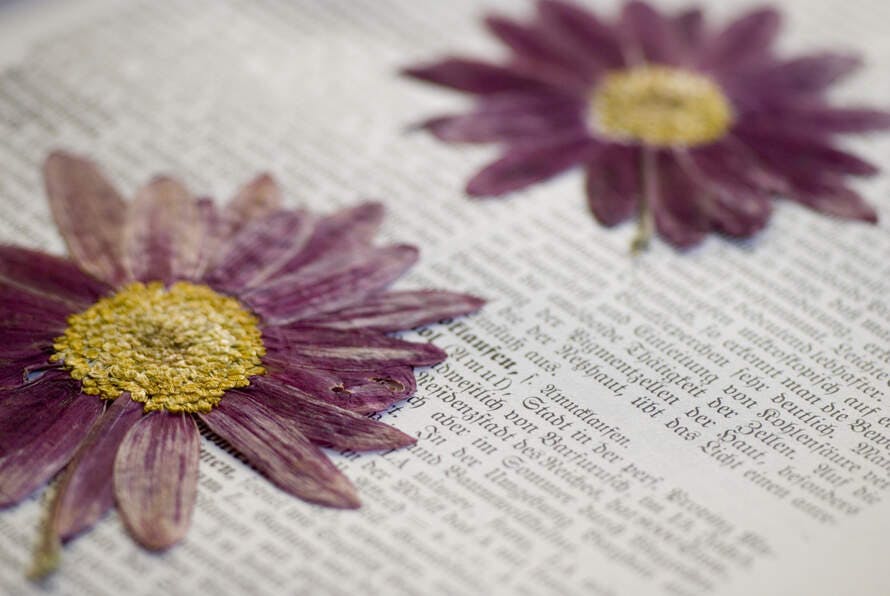
Now that you have your beautifully preserved flowers you will be able to remember that special occasion or bouquet for years to come. You can place them in frames and hang them or use them for various other art projects.
If this has given you some inspiration, then don’t forget to check out the rest of our DIY with Flowers series, and if you are suddenly feeling floral, then check out our wide range of flowers available for delivery to over 90 countries worldwide. Thank you for reading and good luck pressing you flowers!

